Hello ladies and gentlemen, in this article I will tell you how to make a personal computer configurator on WordPress. Of course, I was not able to write a full-fledged plugin myself, but I managed to find working solutions that will help you make a very good configurator for WordPress and WooCommerce. I publish information about a couple of plugins especially for you. I hope it will be useful.
I also made an implementation of a simple configurator with dependencies using Caldera Forms plugin. The variant is not the most elegant, but it works.
What plugins can be used to make a PC configurator for WordPress and WooCommerce
Unfortunately, these will not be full-fledged instructions, but just a list of plugins with hints, I do not have access to the admins of these plugins to describe everything in detail. Anyway, you’ll have to figure it out for yourself. But I’ll be honest, there’s nothing hard about it. These plugins have free versions that you can “feel”. Or demo period.
WooCommerce Product Builder – Custom PC Builder
So, we will solve the problem with the help of WooCommerce Product Builder plugin – Custom PC Builder. Unfortunately, the plugin is paid, but it is very simple and, most importantly, it works. By the way, can work without WooCommerce, the configuration will be sent to you via the feedback form.
It seems to have a free version, but it doesn’t support things like dependencies. And the most important thing in the configurator is to build dependencies between things like motherboard → processor → RAM.
And I simply have not found a better alternative to this plugin. At least for creating a configurator it is the most suitable.
Of course, any exquisite design is not distinguished, but easily fit into the structure of almost any site.
Well, most importantly, you can see how the dependencies work on the plugin’s demo site. The essence of the plugin’s work is simple:
You create a few steps. For example, the first step: choosing a processor.
After the second step will be available: selecting the motherboard, respectively, only those that are compatible with the processor selected in the first step will be displayed.
The third step is RAM. It can only be selected if it is compatible with the processor and motherboard.
You can take as many steps as you like.
Of course, any user can choose to take any step first. For example, first specify the motherboard you plan to use. So the order of the steps is not crucial.
So even though the plugin implies a step-by-step selection, the freedom for the potential client is there.
Suitable not only as a builder for personal computers, but in general for any product that can be configured step by step. Whether it’s for a car or a bicycle.
Honestly, I haven’t seen a better option yet. So I recommend you to try this plugin. It also supports working with filters, sorting by brands.
Chained Products for WooCommerce
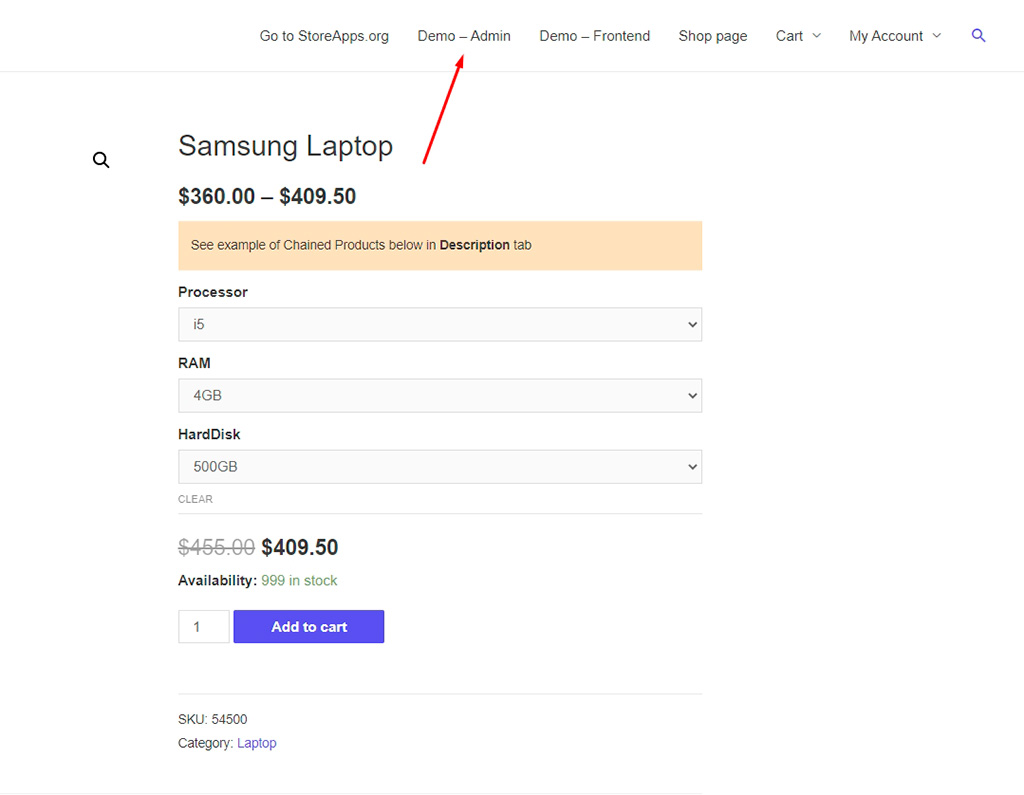
I like this option a little less. But quite workable: https://woocommerce.com/products/chained-products/. Essentially this plugin is a bit of an extension of linked products for WooCommerce . The result will look like this:
Unfortunately, the solution is not the prettiest, but it is possible to build dependencies, albeit not very complex.
You can take it for a trial, you have 30 days to test the plugin, during this period you can get your money back. But to be honest, the option above is both cheaper and better suited for realizing a full-fledged PC builder.
You can see the demo version of this extension for WC on this page: https://demo.storeapps.org/?product=samsung-laptop.
By the way, you can use the admin panel and see how everything works. There’s a link to it on that site.
Give it a try, it may be exactly what you are looking for. As a result, you will get a rather simple solution for WordPress and WooCommerce. However, it will still be hard to call it a full-fledged PC configurator.
Other options
More decent solutions for creating a PC configurator on WordPress I couldn’t find it. These were either plugins from the category “promising, but it doesn’t work” or self-written solutions that turn out to be dozens of times more expensive than plugins.
I also made a “PC configurator with dependencies” with a plugin Caldera Form. The solution is not exquisite, but rather ugly, dull and very crutchy. You can to read more about it.
Crutchconfigurator for WordPress
So, I was faced with the task of making a simple configurator with dependencies, or rather not even a hardware configurator, but just a mapping of end-user goals. The options were as follows:
Visual Product Configurator for Woocommerce. Powerful configurator, has a lot of settings, allows you to implement a visual editor. It is, for my purposes, redundant.
Contact Form 7. Convenient, but there’s a dependency problem. Of course, it is possible to implement with a third-party add-in, but I didn’t want to complicate it. By the way, Metric’s goals in CF 7 it’s pretty easy to add. Knowing CSS you can make a very decent form.
Other types of forms. Ninja Forms is a cool plugin, but dependencies (conditional fields) are paid . Gravity Forms is awesome, but paid . WPForms is ugly and glitchy captcha with constant spam forced to part with this plugin.
In the end I decided to settle on Caldera Forms. Not the most popular plugin, although 100,000+ installs is pretty good, so it’s safe to say that only against the background of some other feedback forms is not particularly popular.
Actually, now it’s time to go directly to the review of creating a simple configurator on Caldera Forms.
Simple actions
So the plugin is installed, now it’s time to start development. Here everything is realized simply: drag and drop a field, select its type, enter data, and it’s done. Nothing complicated, I will not describe such a small thing in detail. For example, in the image below you can see what the fields will look like.
I am developing a server configurator on Caldera Forms. So, we have a drop-down menu with components. For example, “processor.” First, we create the “Processor Type” column. There we specify: Xeon E3, E5, E7, etc.
Now create a separate drop-down menu for each type. For example, in the photo for E3.
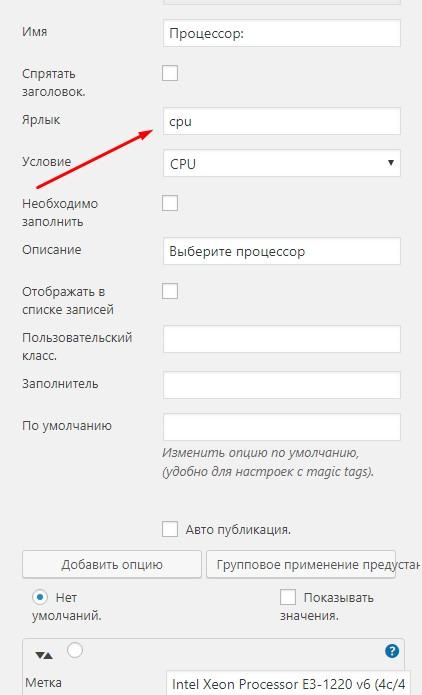
Now turn your attention to “Label.” Here you should specify a unique identifier, which will not be difficult to remember. We’re going to need this a lot from here on out.
So, all the fields have been created. Now we move on to creatingconditional fields.
Dependencies in the configurator
I’ll post a picture below that notes where you need to go to customize the conditions. There’s nothing difficult here, either.
See also. We have a type of condition. The first one is “Hide.” Let’s pick him. In the “If” column, specify the following “Select the type of processor” is not a Intel Xeon Processor E3. In the box on the right, select what to hide. As you can see, it lists the labels that have been specified before.
As you can see, simple logic. If something “is”, “is not”, “is greater than”, “is less than”, “begins with”, “ends at”, “contains”, then perform a certain action on the field.
Multiple conditional rows can be added to each conditional group, and multiple conditions can be used in each conditional row, allowing for quite complex schemes.
What can be done about the field? It can be hidden, i.e. if the conditions are met, the field will not be displayed. Show, in which case the field will be displayed if the dependency set is respected, and Disable, in which case the field will be displayed but cannot be interacted with.
How you proceed depends on your logic, but the dependent fields in the Caldera Forms is quite a powerful tool that allows you to realize quite complex schemes. Use it, I hope I was able to help you. You are now capable of making a fairly complex product configurator for WordPress. Sure, it’s not the prettiest, but it’s effective.


