You probably know that I mainly work with WordPress. I’ve had experience with Drupal, Joomla, and October CMS. But now it’s time to develop another site on a different CMS, which is fundamentally different from the previous ones. Grav is a fairly simple platform, to be honest, even easier than WordPress in many ways. It offers localization in many languages, so creating websites won’t be a problem for many people.
This CMS is built on PHP and uses technologies like the Twig templating engine, Markdown, YAML, and elements of Symfony, such as a CLI interface console and an Event Dispatcher for handling events.
Did I use too many scary words? If we’re going to scare you, we might as well do it thoroughly! This platform doesn’t have a database! It generates static files, meaning any post or page becomes a static HTML page. This might sound daunting, but the system is actually quite good. Let’s take a look.
You can learn about hosting options for Grav and how to work comfortably with it here: https://workinnet.ru/vps-hosting-grav/.
Installing CMS Grav
As always, it starts with the installation. If you’re a hardcore enthusiast not scared by abbreviations like SSH, GIT, etc., you can stop reading now. I’m writing for ordinary people who want to create their own blog with beautiful ladies and card games. If you can install the site via Composer, that’s the most reasonable option since Symfony is definitely lurking in this CMS.
But if you’re an ordinary mortal, we’ll use the simple method:
- Download the installer.
- Run the installation.
- Finish.
So, first, go to getgrav.org, where you’ll see a big “Download Grav” button. Click it and go to the download page. We need Grav core + Admin Plugin. If necessary, the plugin can be installed later.
Before starting the installation, check the requirements:
- Web server: Apache, Nginx, LiteSpeed, Lighty, IIS (almost any)
- PHP version 7.3.6 minimum, but preferably 8 and higher
- For Apache web server, mod_rewrite support is required; for SSL, mod_ssl support is needed
- Full support for all PHP functionality
In principle, nothing more is needed. Any decent (or even not so decent) hosting supports everything. On a VPS, install it manually. I recommend enabling apcu.so and apc.so for cache performance, setting memory_limit to at least 64 MB, and setting realpath_cache_size to 32 MB.
How to do this? Ask your host. It varies everywhere. Sometimes it can be done directly from the admin panel, other times you’ll have to manually edit php.ini.
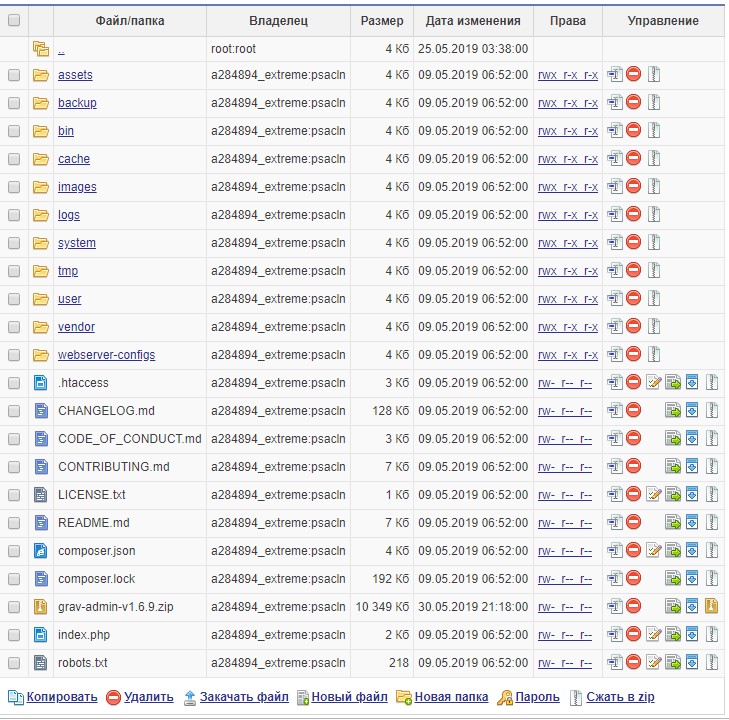
Now, transfer the contents of this archive to the hosting/VPS and place it in the root folder of your domain.
Anyway, extract the folder on the hosting. Either place the necessary folders in the root as shown in the picture below or specify the path to the desired folder in the hosting panel. This depends on the host.
Now go to the website. You’ll see a window. Don’t worry! This is just the installation process; the real horrors await you ahead.
Fill in all the fields with red stars. I hope I don’t need to explain where and what? If needed, use a translator. If you hadn’t installed the admin plugin right away, you wouldn’t see this window. Instead, you’d face the console. Not the best prospect, right?
Filled in? Click the “Create User” button. You’ll enter the admin panel. Honestly, I like its design, it looks nice! However, the site looks a bit plain for now. In the top left corner, next to the GRAV logo, click the link and go to the site. Shall we improve it?
To do this, go to the Themes section and click the ADD button. There aren’t many themes to choose from. I chose the SoraArticle theme. You can stick with the default one, which is also quite good, but you’ll have to tweak it manually. The same goes for installing another theme.
Suppose you decided to install the same theme as I did. An error appears. This means not all dependencies are satisfied. Go to Plugins, click ADD, and find the necessary dependency. Install it. Go back to Themes and continue the installation.
Now let’s simplify our lives and enable the Russian localization. Click the indicated spot on the screenshot. If your native language is different, you can select it from the list.
Conclusion
Congratulations, we have completed the installation of CMS Grav. I’ll soon explain what to do next. For now, enjoy your first experience with this not-so-popular but quite interesting content management system. All the best!


